Monday, July 27, 2009
More Pics
Here is another round of pictures of the Jeep.
I took off some of the masking paper, it was like unwrapping a present! I also cleaned up some stuff and started my re-assembly scheme. I rolled up the budget and am currently in the jeep about $2875.55 including the cost of the jeep. That number does not include my tooling and shop supplies those are rolled up separately.
Hey save some of that paper for next Christmas!
I finally got my garage door so it could be opened again. No fuss from the neighbors yet. It will be a miracle if I can pass by undetected.
I seriously can't wait to rip the booth out of the garage. I have to leave it up for when I do the rollcage, bumper, and nerf bars.
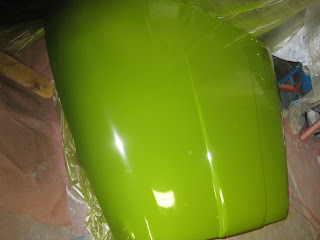
Shiny!
More shiny.
Mug Shot:
__|_/__/_|
___O||||||O_
(O)_)=O=)_)
I can't wait to get this paint in the sun and in a real camera lens for some accurate color representation.
I like how the inside of the engine compartment and the interior of the jeep are black. I think it ties things together nicely.
Straight shootin'.
The grill was kinda fun to paint. It was actually a very challenging painting problem since there are so many different lines you have to follow here for proper coverage.
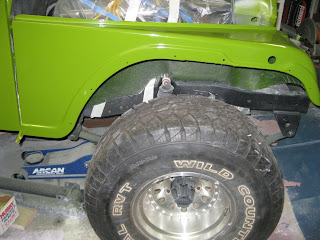
Front left fender. Tomorrow I will bolt these up to the grill and install the hood and bolt the body to the frame. That way things will start to look a bit more "together" as far as the paint job goes. If you look closely the fender is loosely bolted to the tub and hanging from the grill by a wire. Scary.
Fender without shrouds, turn signals, and camo-American-Flag-eagle-feather-checkered-flag flames with skulls? :(
Sunday, July 26, 2009
Going Green
The painting went alright, there were a few runs in the paint and a few run-ins with wet paint. I am hoping most of that will be easy to fix with some wet sanding and some polishing. We sprayed 3 wet coats of DuPont Centari single stage acrylic enamel and a final super-reduced wet coat.
In the body prep: Some imperfections were as big as a penny.
Like this one.
...and some were smaller than the "0" in 2005: (dark red dot).
So I only have two painting action shots. My photographer was afraid of dying.
Painting the interior lines and the windshield frame.
Work complete.
Look at the straightness.
Here is the cherried out hood.
Look at that sparkle!
Green!
The painting crew. Me and my dad. I am the one wearing the shirt with guitar schematics.
Did I mention that we listened to Manowar's Gods of War while we painted. Chemical warfare. I am in paint job Valhalla:
Here are the warriors.
Gator Guard + Gator Paint.
Photographer and project auditor.
Look at those interior lines, I like the contrast of them with the black. There was a bit of overspray that will be easy to fix.
Sunday, July 19, 2009
Prime Time
I finally laid down the primer on the body. Prior to today I have sanded on the body for about three days straight. The first two days I sanded until my fingertips were raw. I then took a break for a day and then sanded another day. Fortunately, I was going up in grit so it got easier for my princess hands. I also did some lightweight body work, but it didn't need a terrible amount of work to begin with.
Spraying paint is not easy. You have to keep the gun perpendicular to the surface and about 8-10 inches from the surface at all times while moving at a fairly slow and steady speed for the duration of the pass. To make matters worse you have to flick your wrist as you start the paint and be spot on with the aforementioned parameters. Let us not forget that the whole assembly filled with paint weighs over 5 lb. As a result, fatigue starts to set in. Also you have to do air hose management keep your spray travels smart (wet edge, protect from overspray, top to bottom) and get yourself into weird positions for painting. Plus you are breathing through a respirator and wearing a chemical suit in a garage in Arizona in the summer hotter than hell. Luckily my dad, an experienced painter, was there to make a decent coach and assistant. For the beginner painter I will recommend at least having a buddy help you out with hose management, refills , ladders, moving stuff, finding areas you missed, coaching you on your speed, distance, and orthoganality to the painting surface.
The air compressor kept up with the Devillbiss FLG-647 HVLP gun. The gun first shot really crumby and wasn't getting enough air (test patterns with lacquer thinner). We then cranked the air at the compressor to like 90PSI, adjusted the at-gun regulator to 35ish psi with the trigger pulled, and then adjusted the gun fluid/air mixture. Things were much better after that.
Things that are of concern:
The primer is somewhat coarse and a lot of wet block sanding will have to be done. Hopefully the primer will scuff up nicely.
We did not have a reducer for the primer so last minute we used the acrylic enamel reducer in an activated primer. We decided to reduce it out after attempts to spray were made. It was coming out too coarse no matter how we adjusted the gun (1.5mm fluid tip). We made a test container with the enamel reducer and it didn't blow up, harden, or boil so we then went to town. From there on out the primer seemed to flow out nicely.
There are a few body repair areas I might have missed (sub-gain-of rice-sized nicks) . I am wondering if I should spray a guide coat and block out the body to 400 and then primer again. It is important to keep things in perspective--this is my first paint job and it is also a jeep. Some people paint old jeeps with paint rollers. On the other hand, the quality of the paint will reflect the quality of my craftsmanship. So do I move ahead working towards real results, missing things that people will not see even under intense scrutiny (but my optimistic perfectionist mind will know where every single one it) or do I go back to delay schedule (I have to have it painted before the 25th of July for various reasons) and possibly cause a more serious problem while trying to remedy a minor problem?
There was a bit of overspray onto the gator guard and some other areas, I suppose I'll have some touch-up painting to do here and there when all is said and done.
Anyways we will see how I answer the million dollar engineering question above, but for now I shall give you a guided tour through some of the primering process photos:
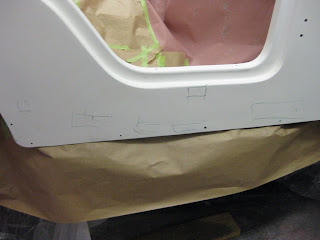
Here you can see some little boxes I drew around trouble areas (places that get bondo and spot putty):
A nick in the hood, that's weird.
There were quite a bit of minor imperfections, you have to find them by spraying guide coats and block sanding, feeling the surface, and looking at the surface.
Here is an action shot of my dad and me. He made this a very smooth process. Arizona John will be making another cameo come the color coat and clear coat.
Mancave inhabitants
I am pretty sure I was out of paint here.
Primered jeep. Most jeep people stop here.
The funny thing is, getting here is the worst part of the whole affair.
Levitating windshield frame. You now know how to take your windshield out yourself!
Full shot. I also positioned all the jeep parts in a fashion so that I could spray all the different edges since I am doing a complete color change.
Gettin up in ma grill. It kinda looks like an Ionic capital.
The gun apparatus
Test patterns
See that smiley face down there? That is a furnace blower which does about 3 air changes to the garage every 5 minutes. Gotta keep fresh air in there.
DIY: Remove a Jeep Windshield
In this entry I will teach you step by step how to remove a windshield from your Jeep CJ yourself.
Step 1: Gather some necessary tools and safety equipment. As shown you will need a hammer and safety glasses.
Step 2: Place the windshield over a suitable disposal receptacle.
Step 3: Gently tap the glass in several areas to loosen it up.
Here I have made plenty of gentle taps to the glass surface.
Step 4: Peel the glass and gasket out of the windshield frame.


